Mastering git rebase --onto
git rebase --onto is one of my absolute favorite git features. I don’t use it every day, but when I use it, it’s super helpful. For all those situations where you branched off a branch before it got merged, and then you need to rebase your branch onto main without handling dozens of conflicts.
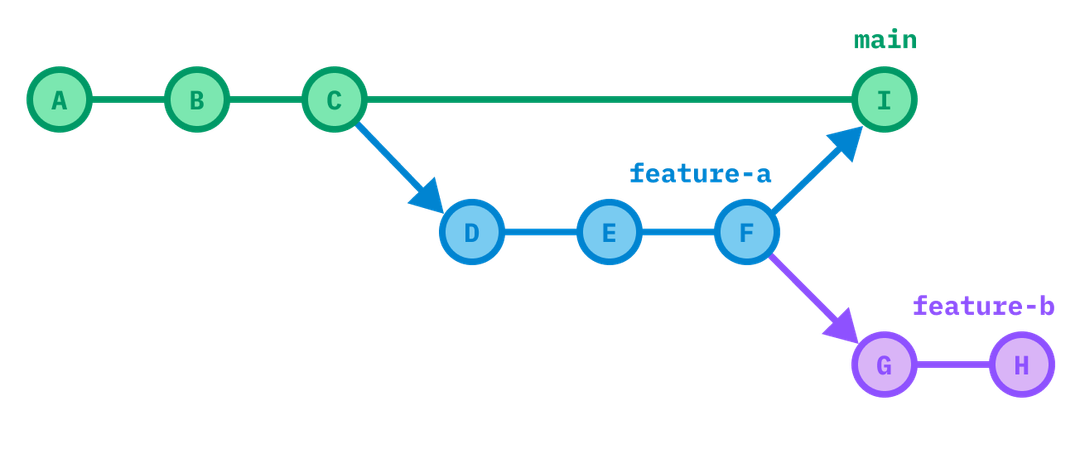
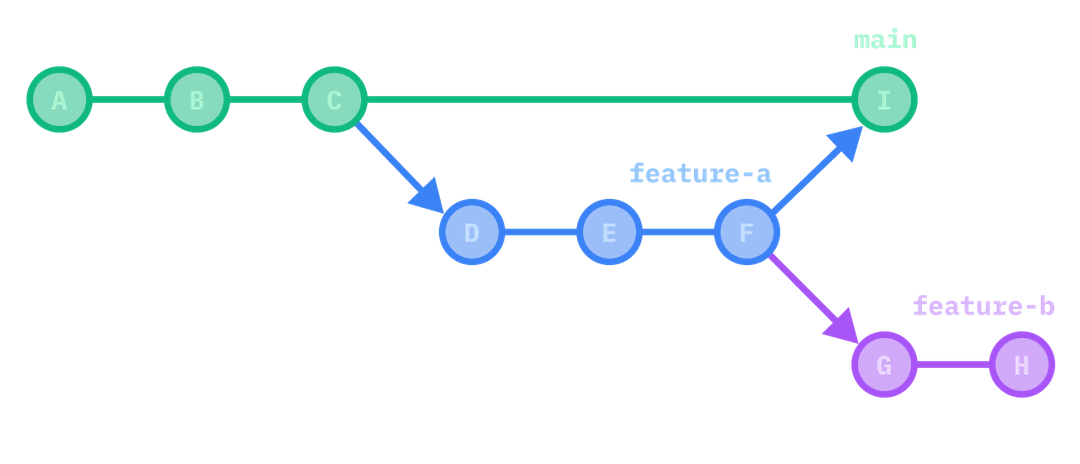
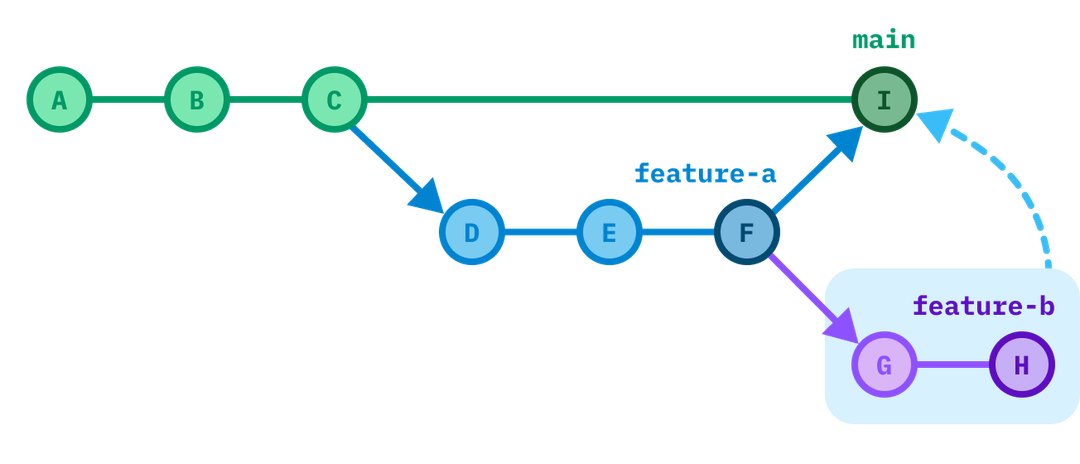
A very common scenario to use git rebase --onto is when you created a branch (feature-b) from another feature branch (feature-a), and feature-a got merged in the meantime. When you use a regular rebase, without --onto, git will go with you step by step through every commit, and most likely will tell you that there are a lot of conflicts to resolve. When using --onto, it’s a single command without any conflicts.
This scenario looks like this:
You now want feature-b to be branched from main, so the history looks like you never even branched from feature-a. Make sure your local git is up-to-date (main, feature-a and feature-b are fetched). Then run:
git rebase --onto I F feature-b
Iis the new parent commit of the branchfeature-bFis the old parent commit of the branchfeature-bfeature-bis …feature-b
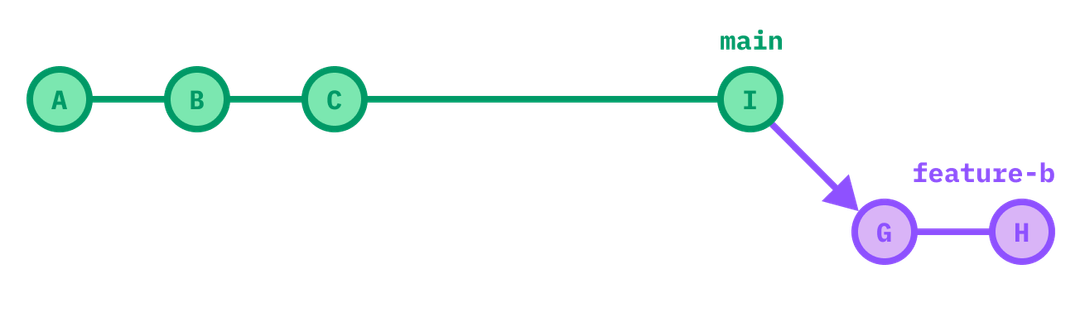
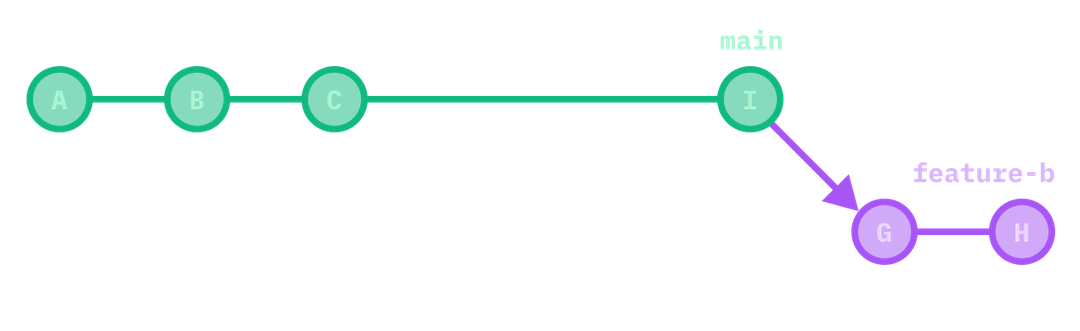
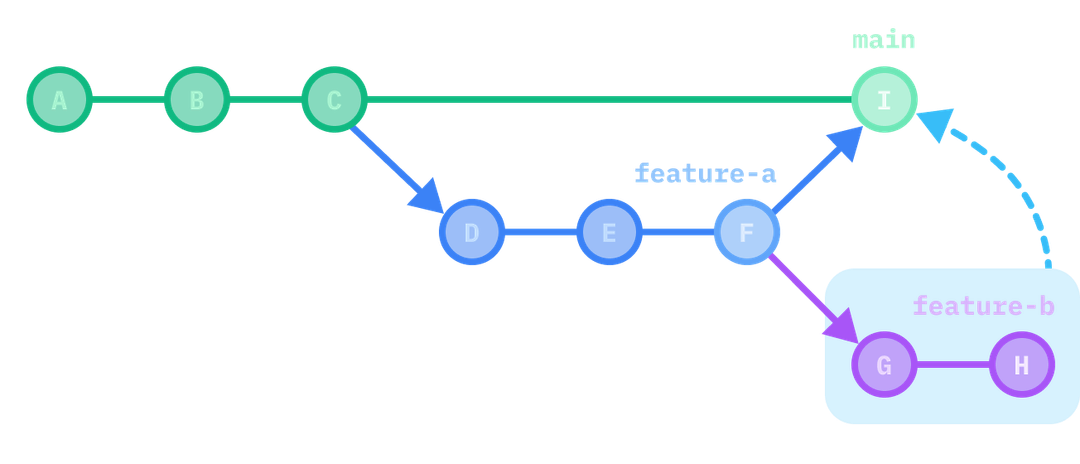
After that, there shouldn’t be any conflicts, and you are immediately in your desired state. Force push feature-b and you’re done.
This is very helpful when feature-a is a Pull Request which is currently being reviewed, and before it’s merged you want to start working on a new feature which depends on feature-a. After feature-a is reviewed and merged, you want to create a new Pull Request for feature-b.
Personal Note on waiting for Code Reviews
Code Reviews have one of the highest priorities in a team. When you’re assigned for a review, finish your last thoughts or the few lines you’re currently writing – which should just take a few more minutes – and then start the review. Code which is sitting there and waiting for a review is a lost opportunity to provide immediate user- and business value. If you’re constantly blocked and have to wait for many hours or even days until your code is reviewed, be assured that this isn’t how it should be. Talk to your team. Send them this paragraph. The only reason why you shouldn’t immediately start a review is because you’re currently not working, or because you’re working on a highly urgent task, in which case someone else should be assigned for review.
How --onto works
The example above is far away from the only reason why you should know about --onto. In general, --onto allows you to select any range of commits and move it on top of any other commit.
A second useful scenario, and good example to see how it really works, is removing previous commits. In the example below, we want to remove D and E from our feature branch.
We do this by selecting the range from commits F to H, and move them onto C. In order to select the range F to H, we need to use the commit sha before the range starts (which is E), and the last commit sha of the range (H).
git rebase --onto C E H
If we run this, then C is the new parent of F, and D is unattached from it. Basically deleting D and E.
Use --onto with only 2 arguments
The last argument is optional – in the example above H. If you omit it, git will use HEAD by default. If your HEAD was already H before you ran the command above, you could’ve also used the shorter version:
git rebase --onto C E
Back to the first example
Looking back at the first example (with our feature-b branched off from feature-a), we now know why this works. The command we ran was:
git rebase --onto I F feature-b
- We select the first commit in the range by using
F– the commit before the range starts. - We select the last commit in the range by using the branch name directly
feature-b. - With this range selected, we put it onto
I.
- If our
HEADalready is the latestfeature-b, we could’ve omitted it. - If our
mainbranch is up-to-date andIismain, we could also writemaininstead. - If we have
feature-achecked out locally and it isF, we could also writefeature-ainstead.
If all of this is the case, we can simply run:
git rebase --onto main feature-a
And now I’ll never forget how this works.
Comment: [email protected]