Automatically backup YouTube Videos I don’t want to lose to my Google Drive, using a Raspberry Pi
There’s a Christmas song on YouTube that has a special place in my heart. I’ve been listening to it every holiday season since its release in 2011. Music has a way of taking us back to memories, and whenever I hear this song, I’m transported back in time. I used to take for granted that it would always be available to me on YouTube, but that all changed in Christmas 2021.
All of a sudden, the song was nowhere to be found.
It was gone from YouTube and even the musician’s bandcamp store. I searched for it everywhere but had no luck finding it. I even reached out to the musician but didn’t hear back from him. Then I stumbled upon a tweet from someone who was also looking for the song, and the musician had responded that it was no longer available online. That was the proof. I’m sure he has a reason for unpublishing it. But for me, it was lost, and I was gutted.
Last Christmas, in 2022, a small miracle happened. I couldn’t stop thinking about the song and desperately wanted to hear it again. Then, a ray of hope: I found the direct link to the YouTube video buried in an old tweet. I entered it into the Internet Archive, and voila! There it was. It played through my speakers, just like that. The Internet Archive had saved this YouTube video from 2011. I was so relieved. And when the song ended, I opened my eyes and immediately made sure to save it, so that I’ll never lose it again.
Backing up videos I don’t want to lose
I started to notice more videos disappearing from my playlists. YouTube doesn’t even tell you what’s been deleted, so who knows what I’ve lost. Maybe they were important to me. Maybe not. But that got me thinking, I don’t wanna lose the stuff that means something to me, or just the stuff I like to watch from time to time.
Around the same time, Philipp wrote a post about how he downloads videos and songs to his Plex server automatically. It looked easy enough, but the best part is that it’s super user-friendly. You just add videos to an unlisted playlist and they get downloaded automatically. It’s seriously the easiest solution I’ve seen. Adding a video to a playlist takes just two clicks, whether you’re on your phone or your computer.
Storing them on Google Drive
Philipp’s setup involves downloading videos to his Plex server, but for me, I just want to keep a backup of my favorite YouTube videos in case they disappear. Call it a ✨ Sicherheitskopie. ✨
As an Android user (boooooh!), I already have a Google One subscription to back up my photos, and I barely use 30% of my Google Drive storage, so it’s a no-brainer for me. And if I ever wanna upgrade to 1TB in the future, the pricing is pretty reasonable.
How ethical is it to download a video from a one Google server – YouTube – and upload it to Drive – just another Google server? I don’t care. Google isn’t scanning your personal files against Content ID and then blocking them or anything. That would be just bonkers and a scandal waiting to happen.
The Plan
A few years back, I bought a Raspberry Pi, but it mostly just gathered dust in a box of random cables since then. This could be the perfect project to repurpose it: using it to automatically download and back up my favorite YouTube videos. Here’s the plan:
- Mount my Google Drive as a network drive
- Download my favorite YouTube videos and save them to the network drive
- Set up an automatic schedule to regularly download new videos in my magic Playlist
Teaser: It’s working far better than expected
I will explain the details of how I’ve set everything up in this post – also for me as a reference, in case I have to do it again. But maybe you’re not interested in those details! No worries, let’s take a quick look at the outcome.
When I tried it out the first time, I was a bit blown away by how fast it was. It only took less than 5 minutes to download, recode, and upload a single 53-minute long 720p video to my Google Drive. I thought that would take much longer—especially on a small Raspberry Pi!
The second time I tried it, I downloaded 11 videos, totaling 77 minutes, and it was done in 20 minutes, including recoding and uploading to my Google Drive. 20 minutes! Downloading, recoding, and uploading it again! I didn’t expect this.
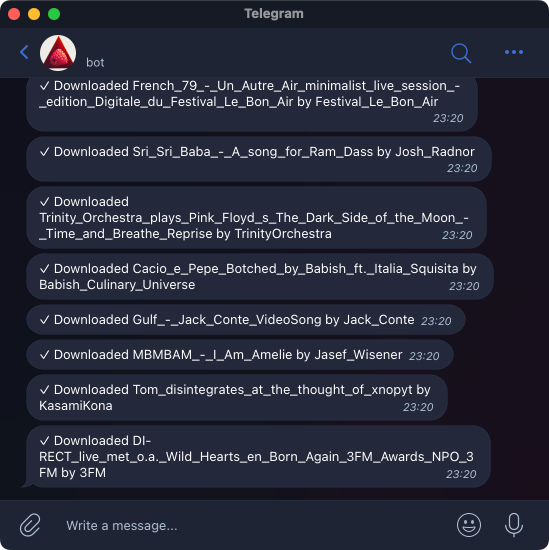
I combined the download script with a small script using Node.js, that sends me a Telegram message when the download is completed or when it encountered an error – which is also an idea I borrowed from Philipp. Thanks, Philipp!
Philipp implemented the playlist-fetching and memorizing of which videos were downloaded by himself. I simply opted to use yt-dlp’s built-in solution to download a playlist.
While it was easier for me to quickly hack this together by just using yt-dlp’s included features, there are upsides to Philipp’s approach. He has control over each video download step.
Regardless of the details, I absolutely adore this solution. And what’s even better is that I have this solution in place. Whenever I come across a video I want to keep, I add it to the playlist and don’t worry about it again. It’s very satisfying to know that my favorite videos can be safe and sound.
Now, let’s dive into the details.
1. Mount Google Drive as a network drive
Rclone allows you mount your Google Drive as a network drive on your Raspberry Pi. I set it up by following this guide I found, but it was actually so easy to set up, that the guide wasn’t really necessary. At least the guide gave me the confidence that I’m doing the right thing.
When you use Rclone for the first time, it will ask you to set up a new remote, but this is a simple step-by-step process. The only thing that tripped me up was creating API credentials. You don’t actually need them, but it’s recommended for a higher API quota, so I thought I just do it. And even though they have a good guide to walk you through it, I still did it wrong the first time.
Don’t make the same mistake I did: just make sure to configure the OAuth Consent Screen before creating the app credentials. Otherwise Google will just create a client id without a client secret, and you’ll need the client secret later on. Because without the secret, it will look like it works, but it doesn’t, yikes! But this isn’t the guides fault, it’s just my fault. The guide explicitly tells you to first configure the OAuth Consent Screen, and I didn’t do it, because I thought I’m smarter.
At some point, you’ll be asked which Google Drive permissions to grant your Pi. You can go ahead and give it full access, but I chose to limit it to read and write access for only the files it creates. That way, it can’t see any of my other files on Drive.
And last but not least, mount your Google Drive:
rclone mount mygdrive: ~/gdrive/ --daemon
mygdrive is just the name of your remote, which you set up earlier. ~/gdrive/ is the directory where I mounted my Drive. The --daemon flag just runs the mount in the background.
Now Google Drive should be mounted as a directory, and the first step is completed. To make sure everything’s working, I created a new file in my mount directory and it showed up on the Google Drive web interface. So far, so good!
2. Download videos from YouTube
yt-dlp is a fork of youtube-dl, which allows you to download YouTube videos with a ridiculous amount of options. It requires ffmpeg to function properly.
Installing both yt-dlp and ffmpeg on the Raspberry Pi was very quick and painless. In contrast, installing ffmpeg on my expensive MacBook M1X Pro using Homebrew takes ages because it first compiles the Linux Kernel from scratch and then mines a bitcoin often requires updating and installing numerous dependencies.
Below is the complete command that I am using to download videos.
yt-dlp \
  -P "/home/pi/Videos" \
  -P "temp:tmp" \
  -o "../gdrive/Video/%(title)s - %(channel)s - %(id)s.%(ext)s" \
  --restrict-filenames \
  --download-archive "~/Videos/downloads_downloaded.txt" \
  -f "bestvideo[height<=1080][ext=mp4]+bestaudio[ext=m4a]/best[height<=1080]" \
  --recode-video mp4 \
  https://www.youtube.com/playlist?list=xxx
This may look intimidating, but here’s an explanation what each component will do:
First: Setting up some folders
  -P "/home/pi/Videos" \
  -P "temp:tmp" \
To begin with, we need to specify the working directory for yt-dlp. yt-dlp generates some intermediate files during the download process, and we don’t want them to be synced to Google Drive via Rclone, because that would slow us down. For this reason, we set the working directory to be /home/pi/Videos.
The temp:tmp option specifies that temporary files should be stored in a separate directory called “tmp”. I actually don’t know if it’s necessary, but it also won’t hurt to have it.
Next, we define the output path for the downloaded video:
-o "../gdrive/Video/%(title)s - %(channel)s - %(id)s.%(ext)s" \
As we want the downloaded video to be saved in the mounted Google Drive, we point to the relative path inside Google Drive.
According to the docs, the path must be relative; otherwise, the -P option won’t work. A little bit weird, but it does the job.
This will move the downloaded video into a Video/ folder on my Google Drive, and give it a descriptive name. %(title)s will be replaced with the video’s title, %(channel)s with the name of the channel, %(id)s is the ID of the video, and %(ext)s the file extension.
Finally, the last part of the video file setup:
--restrict-filenames
This will remove any special characters in the video’s name and replace them with underscores.
Next: Remember if a video was already downloaded
We want to execute the above command regularly to download new videos. But we don’t want to download the same videos again and again. We only need to download them once. And of course youtube-dl (and its cool cousin yt-dlp) has a built-in solution for that: the “Download Archive”.
The Download Archive file stores the IDs of all the videos you’ve already downloaded. All you need to do is add this option to your command:
--download-archive "~/Videos/downloads_downloaded.txt"
And voila! yt-dlp will check the archive before downloading each video and only download it if it’s not already on the list. I store this file in a local directory and not inside the Drive, because… I used a location inside the network drive and it didn’t work. 🤷♂️
Then: Configuring the video quality
Now we can configure what video quality we want to download. I actually don’t know a lot about this part, haha. But I asked ChatGPT to create it for me, and it just worked.
  -f "bestvideo[height<=1080][ext=mp4]+bestaudio[ext=m4a]/best[height<=1080]" \
  --recode-video mp4 \
I wanna download videos with a maximum resolution of 1080p, and only as mp4. It would otherwise download webm, and I don’t trust webm as long as it isn’t a commonly shared file format.
bestvideo[height<=1080][ext=mp4]+bestaudio[ext=m4a]requests a 1080p video as mp4, and separately downloads the best audio quality with it. The video and audio track will then be merged into a single file after they’re downloaded./best[height<=1080]means that if a video using the above criteria cannot be found, I just want the best available audio and video with a maximum resolution of 1080p.--recode-video mp4is used to tell it to recode the video to an mp4 when it isn’t an mp4. Although we configure mp4 above, it could download another format when it can’t find an mp4.
Final part of that command: Configure your Playlist, and that’s it!
The final part of this command is to specify the URL of your playlist. Philipp explains this well in his post: you’ll need to ensure that the playlist is set to unlisted instead of private, and that the videos are sorted from newest to oldest.
Once you’ve set up the playlist, the script will go through it, check which videos haven’t yet been downloaded, and proceed to download them. Once the downloads (and maybe recoding) is complete, the file will be transferred to the Google Drive, and it’s all done.
3. Run the Download on a regular interval
To run this command automatically, you’ll want to set up a cronjob. The cronjob just runs a command at a specified time interval. You can edit your cronjobs using crontab -e, and paste in something like this:
0 5,11,18,23 * * * sh /home/pi/yt-download.sh
This will run the download script every day at 5:00, 11:00, 18:00 and 23:00. This is what I chose, you could choose whatever schedule tickles your pickle.
I’m not calling this huge command inside the cronjob. I copied the yt-dlp command it into a shell script called yt-download.sh, and run this shell script in the cronjob. That way, if I need to change anything, I can just update the script instead of messing around with the crontab file.
Done. This is what I love about computers
And that’s it! It works!
It’s so satisfying to see how pieces just work together. Like gears which fit perfectly into each other. It’s done, and we just used existing solutions. Not even had to write a single line of code.
To take it a step further, you can add more pieces to it. I’m parsing the output logs, so I can search for new downloads and trigger a Telegram notification when it found one. But that’s just neat gimmicks on top.
Comment: [email protected]